Creating the perfect burger is more than just quality meat and toppings. A fluffy, homemade (or bakery-bought) bun is essential. These brioche-style burger buns are so soft and fluffy and have enough flavour on their own that they serve as a great vessel for whatever toppings you can image. They’re not so overwhelming that all you can taste is the bun and big enough that you can fit 2 quarter-pound patties in it (my husband’s one requirement for a bun).

After a million different recipes, this is the classic burger bun recipe that I keep coming back to when I want a great burger. I hope you enjoy it as much as my family does!
Sample Schedule – Ready to Use by 6:00 PM
2:00 PM – Start proofing the yeast
2:05 PM – Make the dough
2:15 PM – Rise for 1 hr, 45 min (may take up to 2)
4:00 PM – Reshape
4:05 PM – Second rise for 45 min – 1 hour
4:45 PM – Preheat oven
5:00 PM – Bake for 18-22 minutes
5:20 PM – Remove from oven, allow to cool for 30 minutes
5:50 PM – Enjoy!
How to Make the Brioche-Style Classic Burger Buns
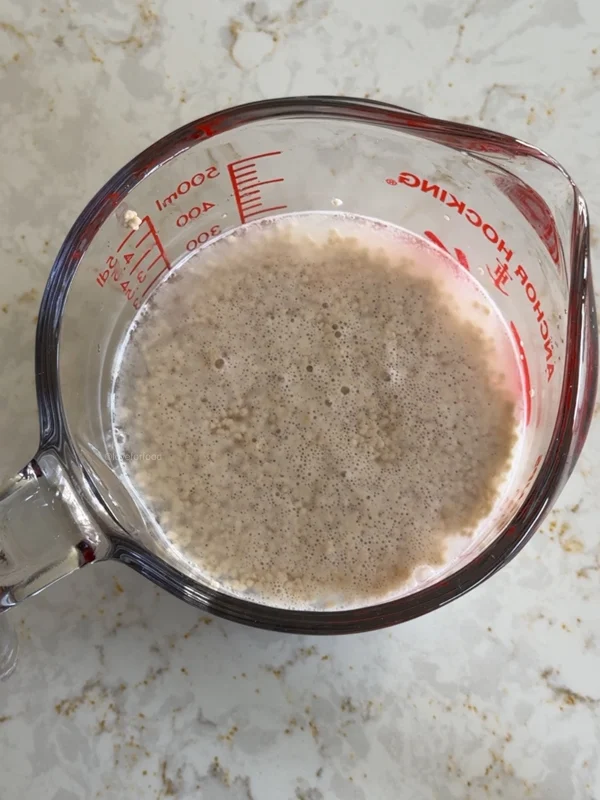
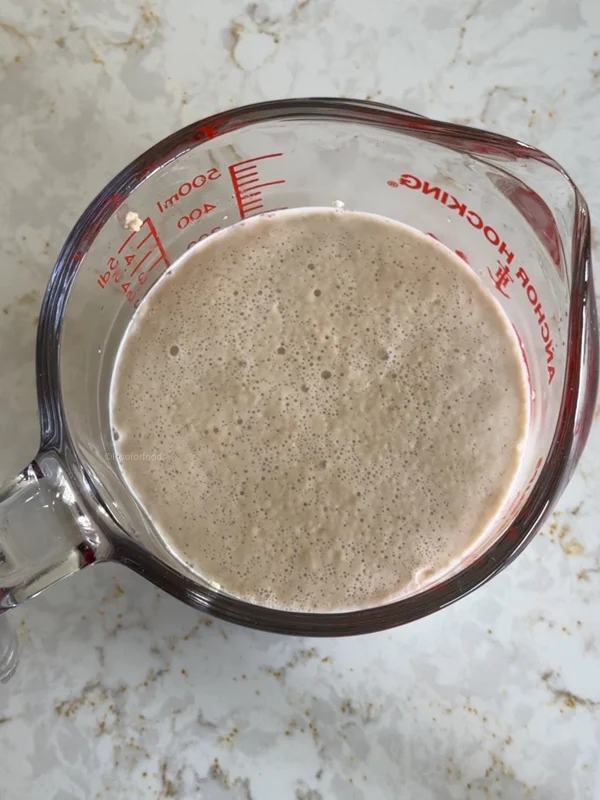
Proof the Yeast
In a small bowl, stir to combine 275 ml (1 ¼ cups) of warm water between 100-110°F (not too hot or it will kill the yeast) and 12 g of active dry yeast (4 tsp). Set aside for 5-10 minutes to proof.
Make the Dough
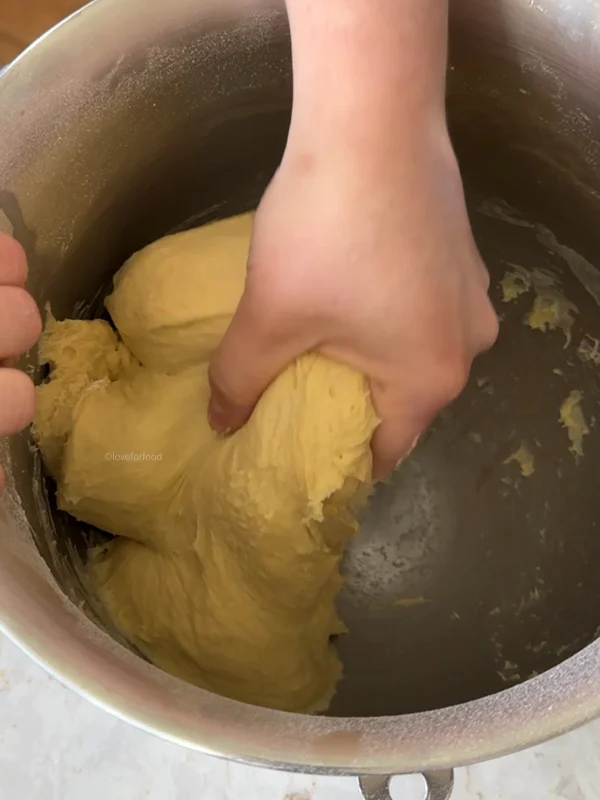
In the bowl of a stand mixer add 600 g (4 cups) of all-purpose flour, 25 g (2 tbsp) of sugar, and 1 ½ tsp fine sea salt. Stir to combine and make a well in the middle. Add in 2 large eggs, the proofed yeast, and 37 g (2 ½ tbsp) of salted butter that has been melted and cooled.
On low speed with the dough hook, mix the ingredients until some of the mixture looks like cake batter (most of the flour will be unmixed). Increase the speed to medium until it forms a shaggy dough.
Keeping the speed on medium to medium-low, knead the dough for 5-6 minutes until the dough is smooth and elastic. Remove from the dough hook and roughly form into a ball. Cover with plastic wrap or a damp towel and let it rise for 1.5-2 hours or until doubled in size. This will depend on the temperature of your home – warmer = faster.


Shaping the Buns and Second Rise
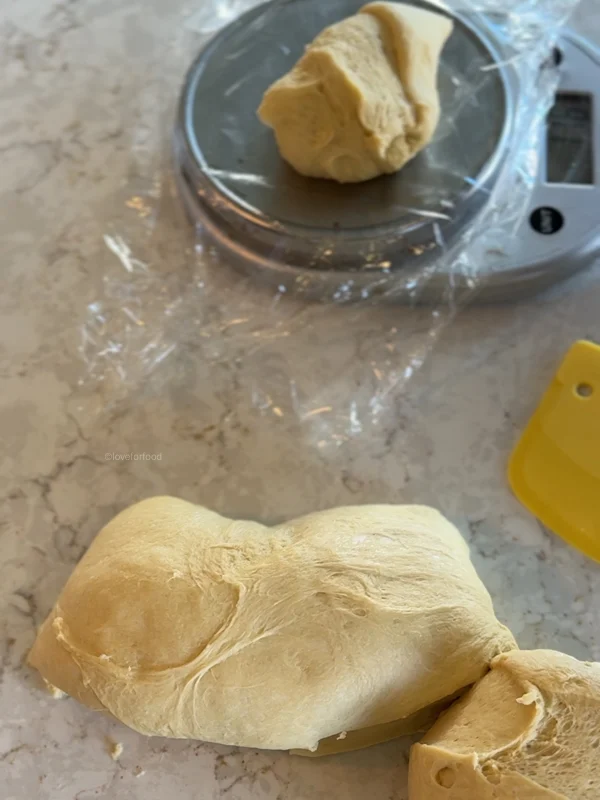
Once the dough has risen, punch it down and remove the dough onto a clean countertop (no flour).
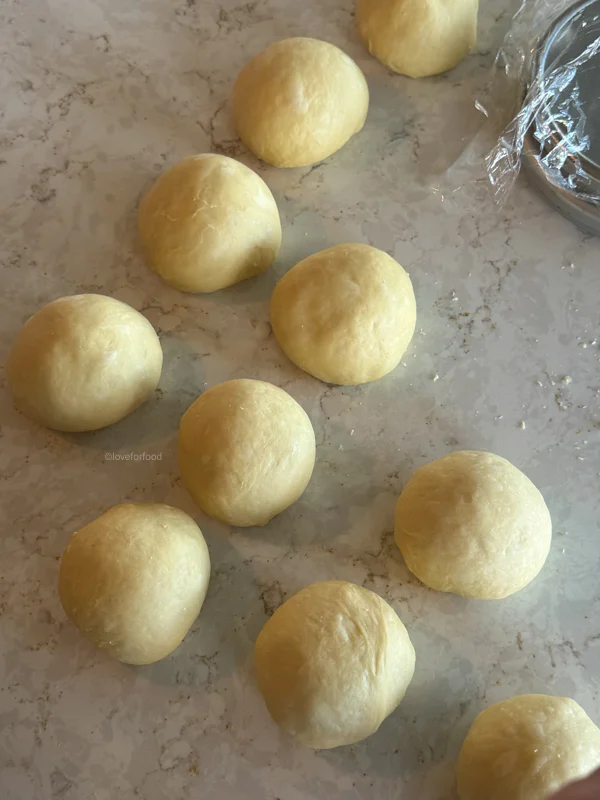
Divide your dough into 10 evenly sized pieces – you can do this by hand or use a food scale to weigh out the dough pieces. My dough pieces were approximately 104 grams each.
Once you have divided the dough, form each piece into a tight dough ball. Fold the dough in half and then pinch in the sides at the bottom. Place the dough on the clean counter and nudge it towards and away from you gently to seal the bottom of the ball. This may take some practice, but play around and see what works for you!


Once all your burger dough balls are formed, place them on a large baking tray lined with parchment paper. Space them apart by at least 1″ (they will still be touching) and press down gently to widen the dough ball. This will create more of a burger shape and less of a balloon shape when risen and baked.
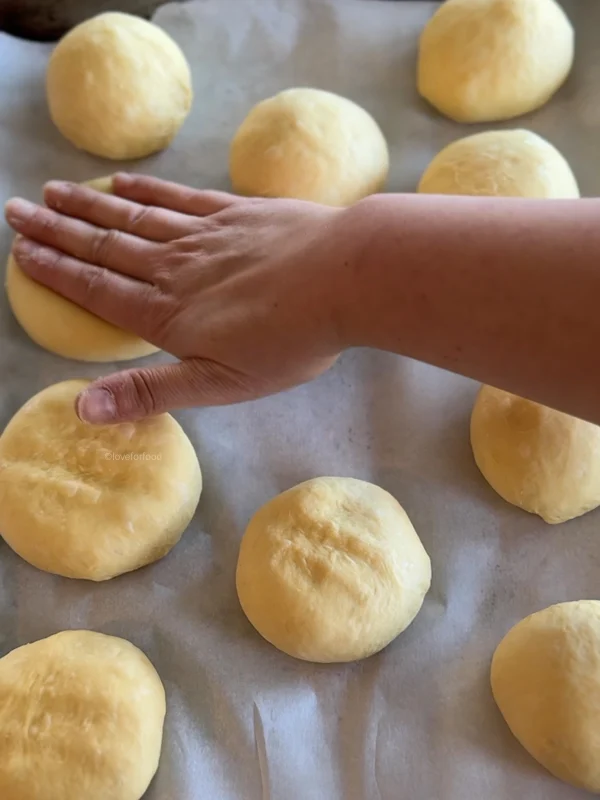
If you’d prefer your buns not to be touching when they bake and be perfectly round, separate onto 2 baking sheets instead.
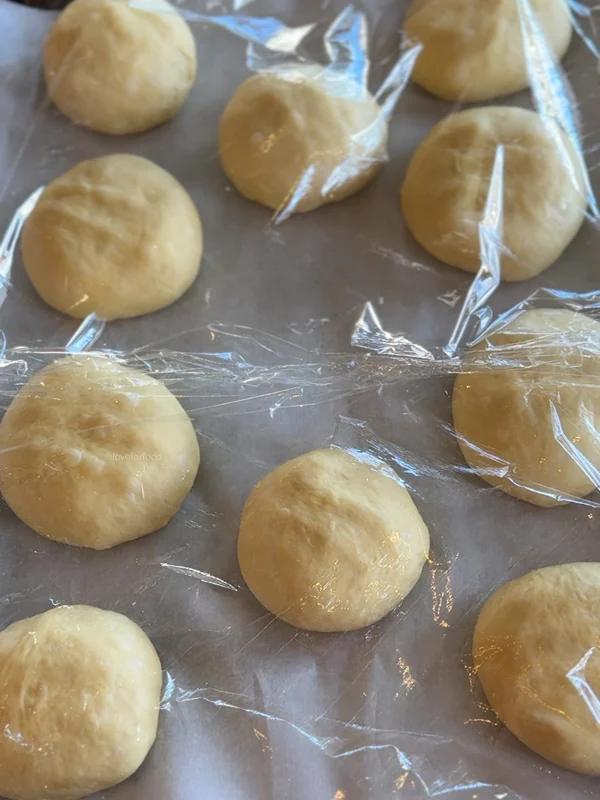
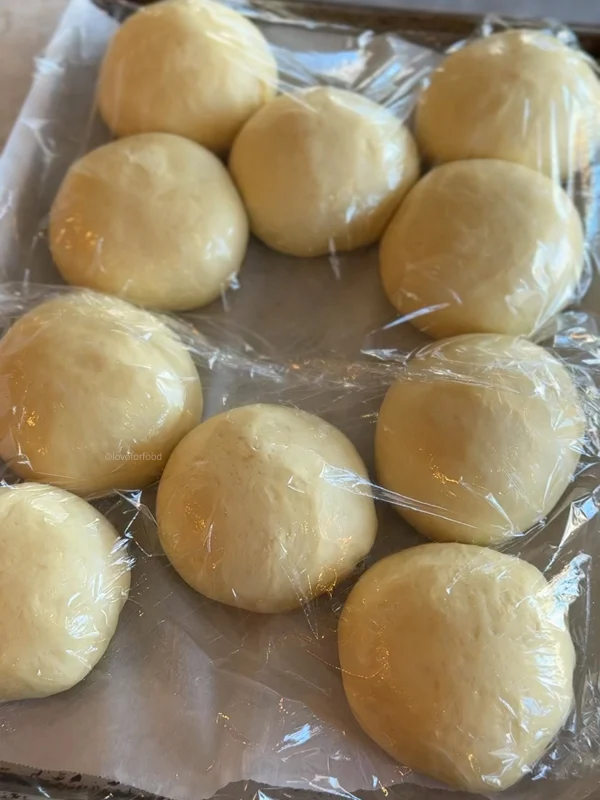
Once the dough balls have been formed and pressed, cover lightly with plastic wrap and set aside to rise for another 45 minutes to an hour. About 20 minutes before the rise time is up, begin preheating your oven to 375°F.
Baking the Buns
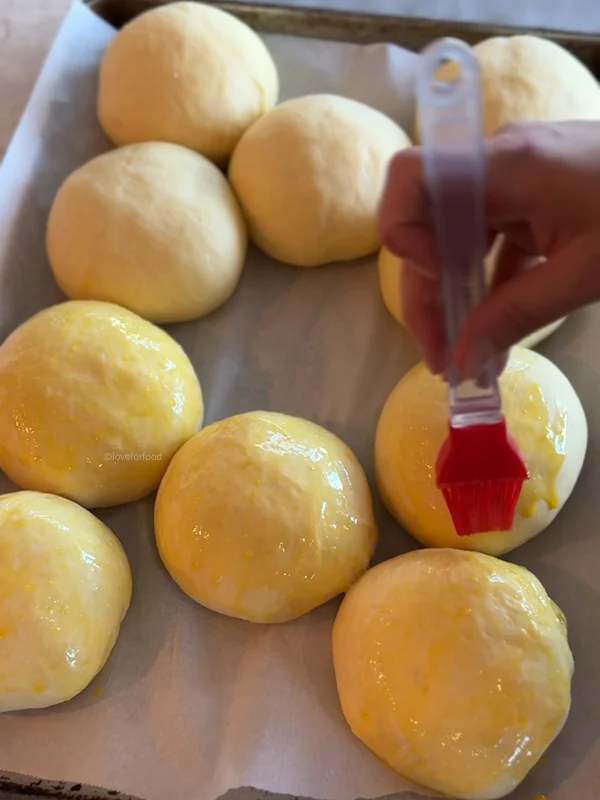
Once doubled, gently remove the plastic wrap and whisk an egg in a small dish. Using a pastry brush, gently coat the buns in egg wash. This will give it a nice golden brown colour, help the sesame seeds stick, and give it a sheen that is very visually appealing. You can opt to use melted butter before and after baking if preferred.
Sprinkle gently with sesame seeds.

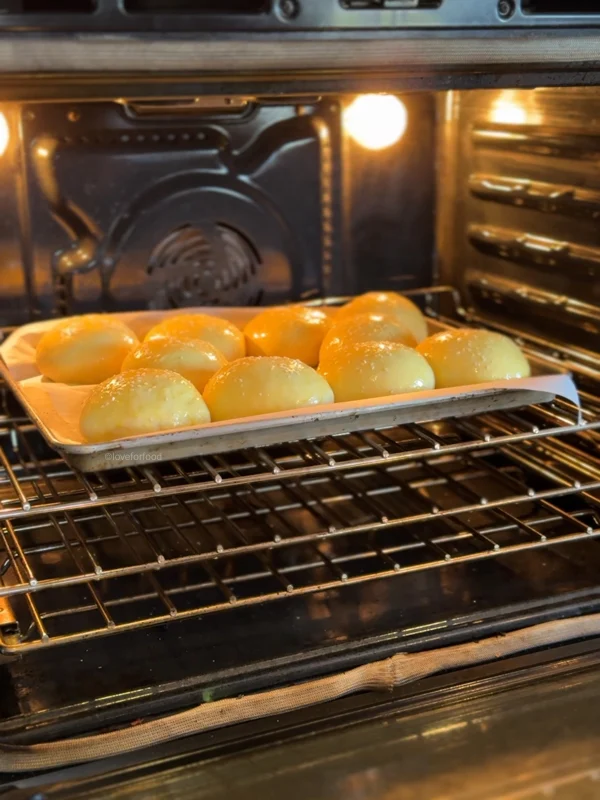
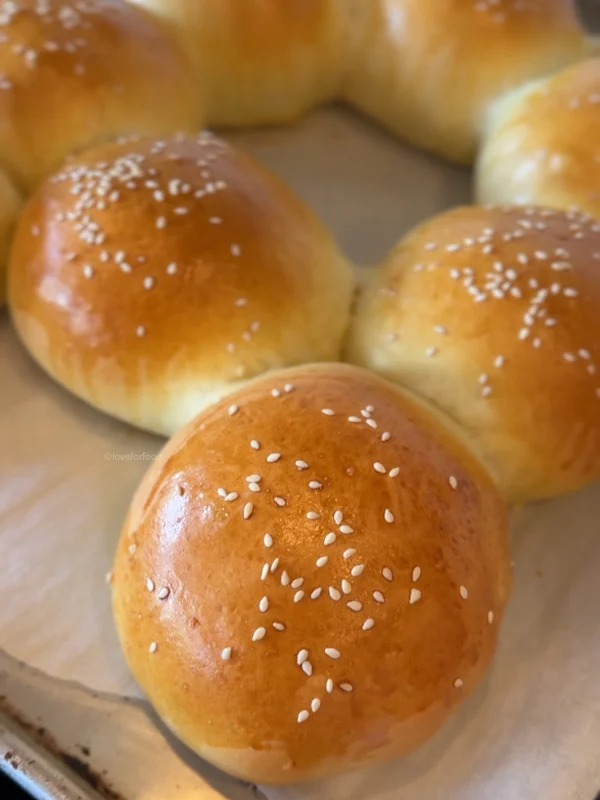
Place the risen and egg-washed buns onto a rack set in the middle of the oven. Bake for 18-22 minutes, turning around the 15/16 minute mark to ensure even baking. Once they are deeply golden brown, remove from the oven and set the tray on a cooling rack.

Cool and Enjoy!
Allow the baked buns to cool for at least 30 minutes before using/cutting open. Let them cool completely before storing in a resealable container or bag. Remove as much air as possible if using a bag and freezing without squishing them. Thaw for 30 minutes individually on the counter or for a few hours in a sealed container to prevent them from drying out.
Best enjoyed the day of or frozen the same day. Stays fresh for about 2-3 days in a sealed container at room temperature.
Looking for an Egg-Free Burger Bun? Try my recipe for the Best Vegan Sandwich Buns, but reduce the recipe from 15 buns to 10-12 and press down on the dough balls before their second rise.
Brioche-Style Classic Burger Buns
Ingredients
Equipment
Method
- In a small bowl, stir to combine the warm water between 100-110°F (not too hot or it will kill the yeast) and the yeast. Set aside for 5-10 minutes to proof.
- In the bowl of a stand mixer add the flour, sugar, and salt. Stir to combine and make a well in the middle. Add in 2 of the eggs (reserve one for the egg wash), proofed yeast, and (cooled) melted butter.
- On low speed with the dough hook, mix the ingredients until some of the mixture looks like cake batter (most of the flour will be unmixed). Increase the speed to medium until it forms a shaggy dough.
- Keeping the speed on medium to medium-low, knead the dough for 5-6 minutes until the dough is smooth and elastic. Remove from the dough hook and roughly form into a ball. Cover with plastic wrap or a damp towel and let it rise for 1.5-2 hours or until doubled in size. This will depend on the temperature of your home – warmer = faster.
- Once the dough has risen, punch it down and remove the dough onto a clean countertop (no flour).
- Divide your dough into 10 evenly sized pieces – you can do this by hand or use a food scale to weigh out the dough pieces. My dough pieces were approximately 104 grams each.
- Once you have divided the dough, form each piece into a tight dough ball. Fold the dough in half and then pinch in the sides at the bottom. Place the dough on the clean counter and nudge it towards and away from you gently to seal the bottom of the ball. This may take some practice, but play around and see what works for you!
- Once all your burger dough balls are formed, place them on a large baking tray lined with parchment paper. Space them apart by at least 1" (they will still be touching) and press down gently to widen the dough ball. This will create more of a burger shape and less of a balloon when risen and baked.
- If you'd prefer your buns not to be touching when they bake and be perfectly round, separate onto 2 baking sheets instead.
- Once the dough balls have been formed and pressed, cover lightly with plastic wrap and set aside to rise for another 45 minutes to an hour. About 20 minutes before the rise time is up, begin preheating your oven to 375°F.
- Once doubled, gently remove the plastic wrap and whisk the reserved egg in a small dish. Using a pastry brush, gently coat the buns in egg wash. This will give it a nice golden brown colour, help the sesame seeds stick, and give it a sheen that is very visually appealing. You can opt to use melted butter before and after baking if that’s preferred.
- Sprinkle gently with sesame seeds.
- Place the risen and egg-washed buns onto a rack set in the middle of the oven. Bake for 18-22 minutes, turning around the 15/16 minute mark to ensure even baking. Once they are deeply golden brown, remove from the oven and set the tray on a cooling rack.
- Allow the baked buns to cool for at least 30 minutes. Best enjoyed within a few hours of baking.

Recent Comments