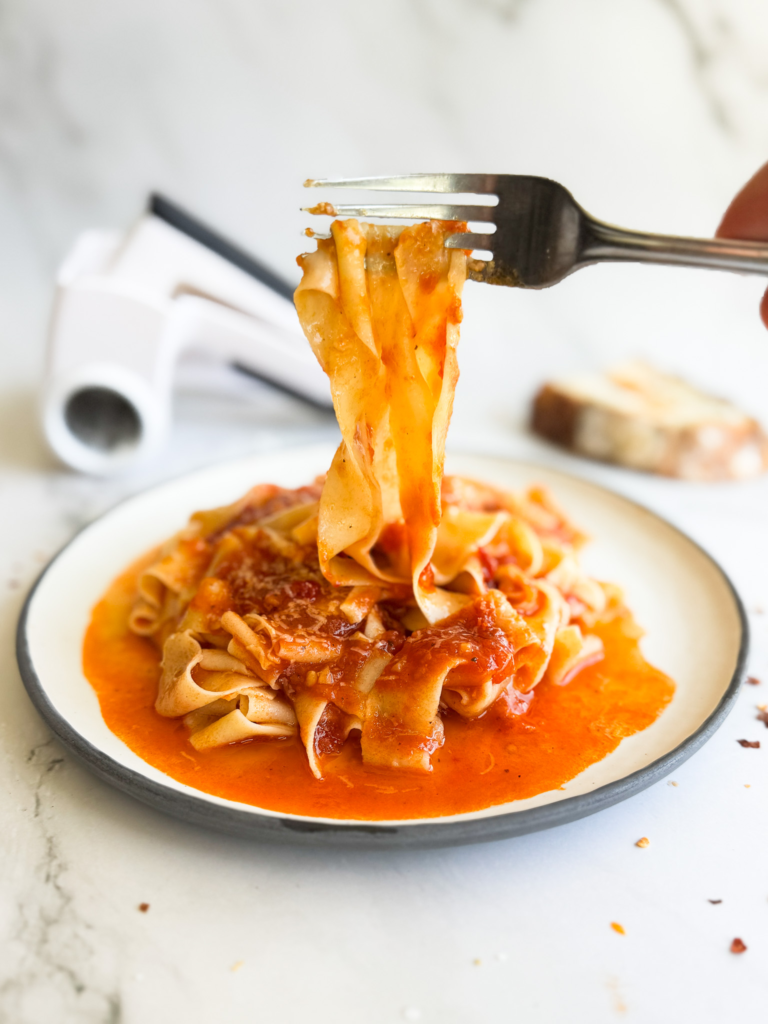
Easy and Delicious Homemade Pasta
Fresh homemade pasta is NOT something to be scared of. With only 2 ingredients and detailed instructions, homemade pasta can be on your table within 2 hours. The chewiness, the flavour, and the satiety of fresh pasta is unrivaled. This easy and delicious pasta recipe uses readily available pantry/fridge staples and doesn’t require any fancy equipment.
Now you can follow fancy pasta recipes using 00 flour, only egg yolks, adding olive oil, all with promises of being the best fresh pasta ever. After making pasta for years and trying multiple recipes and methods – the best is almost always the most simple IMO.
The key to making great homemade pasta every time is to add flour gradually while whisking by hand and then working and kneading the rest of the flour into the dough until you have a cohesive, smooth, and firm dough. It’s a decent amount of work but it’s worth it. It gets easier every time you make it too!
- Although no fancy equipment is needed – I highly recommend a pasta maker to roll out the dough (either manual or an attachment). Rolling by hand is a lot of work and I’m too intimidated to try – but it can be done.
Fresh pasta is one of those things that seems really intimidating, but once you get the hang of it, it’s not too difficult and it will impress anyone who tries it!
If you’re still not sure, I’ve included instructions using a stand mixer and a food processor, but I prefer doing it by hand.
Italian 00 Flour or All-Purpose Flour
Most flour in Canada is made from 100% Durum Wheat or another hard wheat. Durum wheat is the same variety of grain that is grown in Italy for use in breads and pasta. Durum means “hard” in Latin, referring to the hard wheat. Soft wheats are more commonly used in pastry flour.
00 refers to the milling size, being a finer grind than standard flour, but the difference in the end product is minimal and paying the extra (sometimes exorbitant) cost is not worth the minor differences for fresh pasta.
I always buy Roger’s Unbleached All-Purpose Flour – I’ve found it performs the best in creating strong sourdough bread and delicious homemade pastas and dough.
If your flour is not made from durum wheat, use a hard wheat that is finely milled for the best results. Bread flour is typically a harder wheat that is higher in protein versus regular flour. I do not recommend using durum wheat semolina. Semolina is a much coarser grain and will not yield smooth results. You can sub 1/4 of the flour for semolina, but using it in its entirety does not yield great results in my experience. The semolina does add great flavour though!
- Some countries do have finely milled semolina flour and this is great for pasta making. Try substituting 1/3 of the flour for semolina in this case.
Egg Sizes
This chart uses Canada’s egg size grading system, and is nearly identical to US guidelines. Medium eggs in UK are large eggs in the US and Canada.
Feel free to mix and match sizes for the recipe as long as your final egg weight (shell on) balances out. This recipe uses 5 large eggs = 10 oz, meaning you’d need 4 jumbo eggs or 6-7 small eggs.
| Small | Medium | Large | Extra-Large | Jumbo | |
| Weight in grams | 42 g | 49 g | 56 g | 63 g | 70 g + |
| Weight in oz | 1.5 oz | 1.75 oz | 2 oz | 2.25 oz | 2.5 oz + |
Equipment Needed
I have used a traditional pasta roller and the attachment for the KitchenAid. The traditional roller is beautiful but it’s difficult without an assistant. The stand mixer attachment is great because you can have both hands ready to feed and catch the pasta while you’re rolling it. The only downside is that they can be pricey.
Otherwise you can use a rolling pin. Traditionally, many people will use a long wooden rolling pin to roll out giant sheets of pasta. The key is to roll it out slowly to avoid ripping and bubbles. There are many great videos online of old Italian grandmas demonstrating this. It’s neat to watch.
How to: Making Homemade Pasta
By Hand (my preferred method):
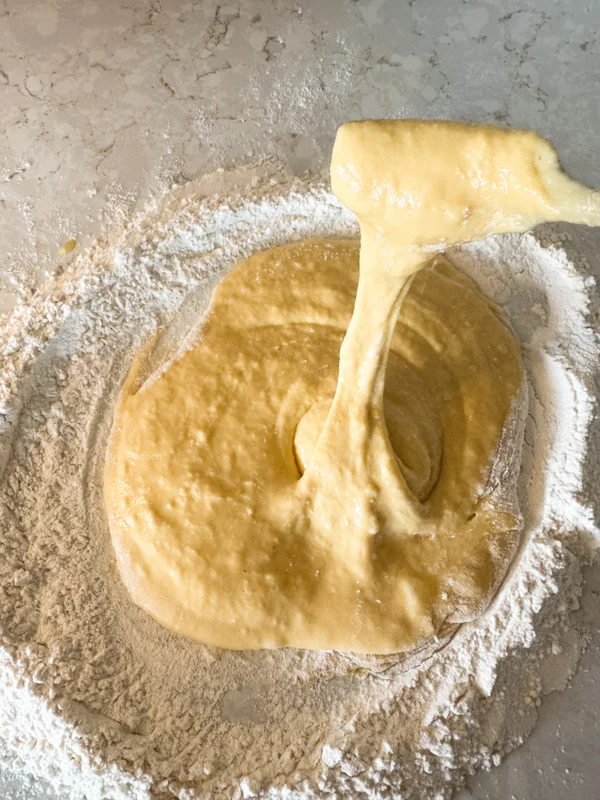
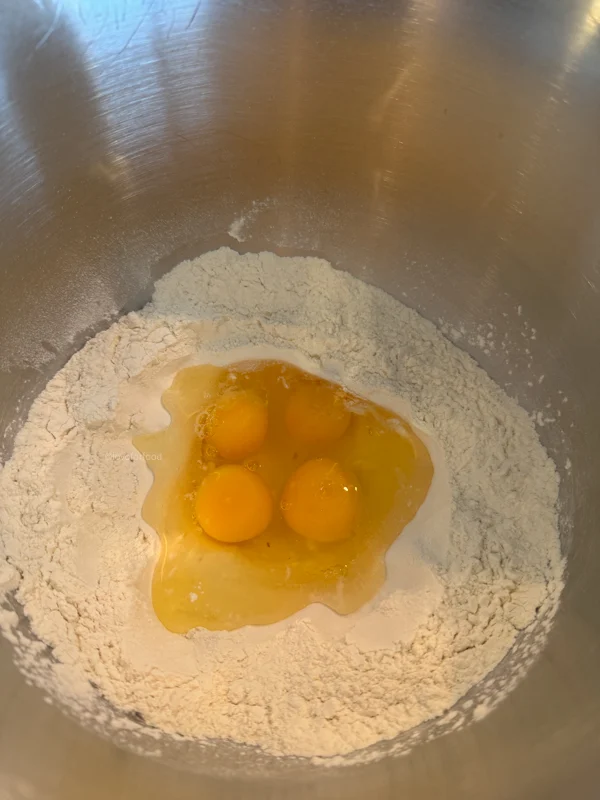
Place a mound of flour on a clean surface and make a large well in the center. Crack the eggs into the well and use a fork to break up the yolks and begin to whisk.


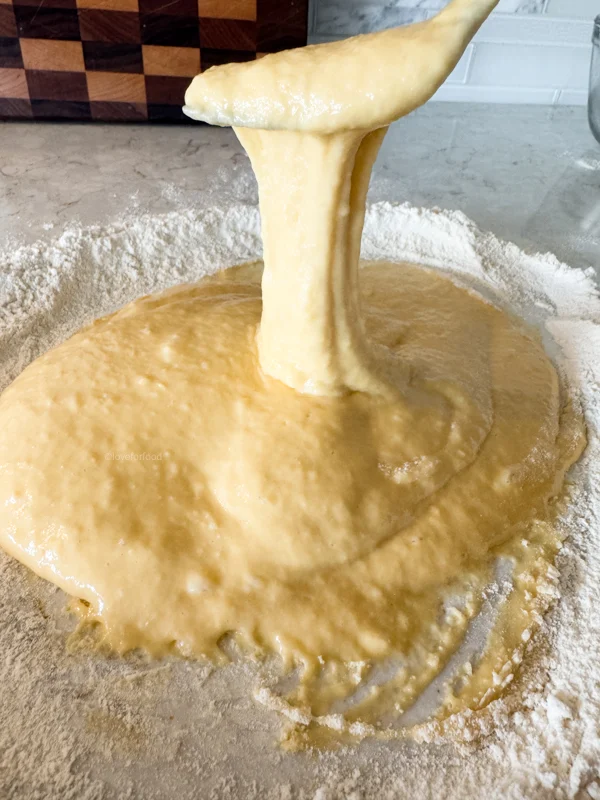
Beat with the fork as you incorporate more flour until the egg/flour mixture becomes extremely thick and gooey. When you pick up your fork the mixture should hold onto it and slowly fall (not “rip”).
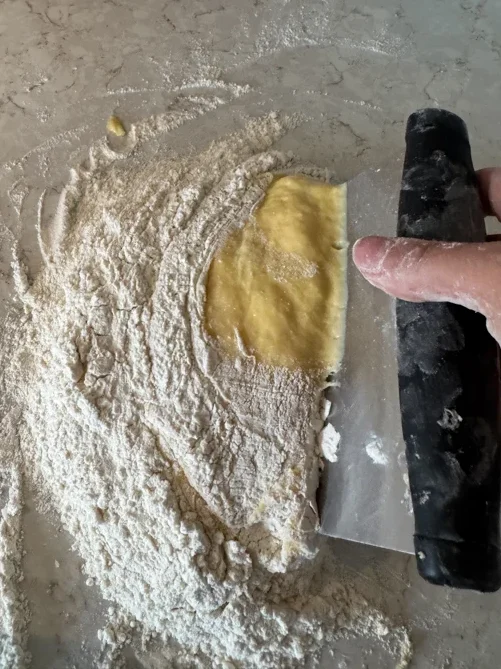
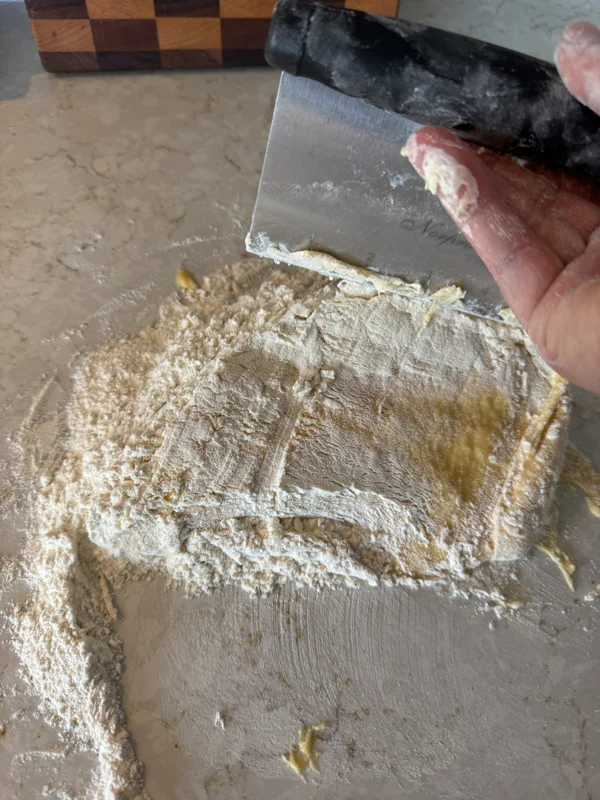
Using a bench scraper, scrape up the flour and fold over the egg mixture from each side. Continue doing this until almost all of the flour has been incorporated. Begin scraping in a scooping circular motion and folding the dough over itself. Continue doing this until it somewhat comes together into a dough mass.
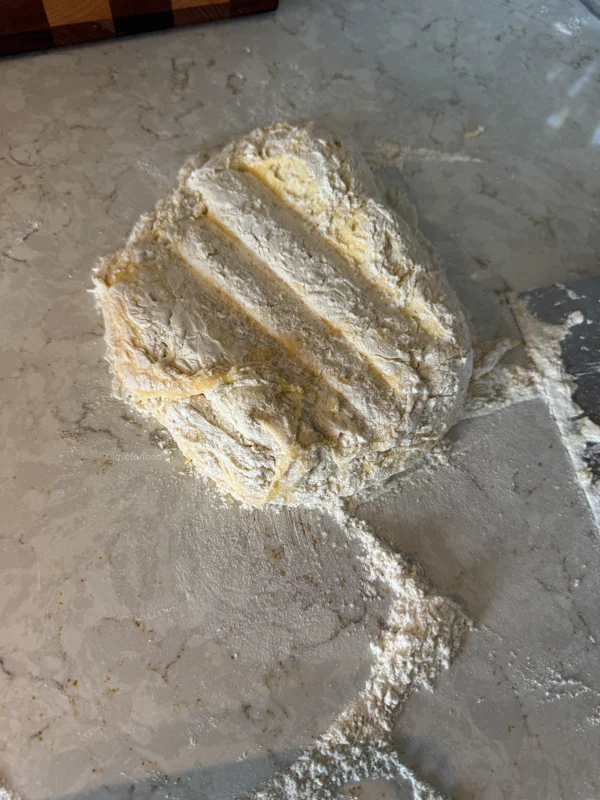
Begin to knead the dough together into a cohesive ball by folding it over itself multiple times until it’s no longer too sticky to handle. Work the remaining flour in and begin kneading the dough with the heel of your palm, dragging the dough away from you.


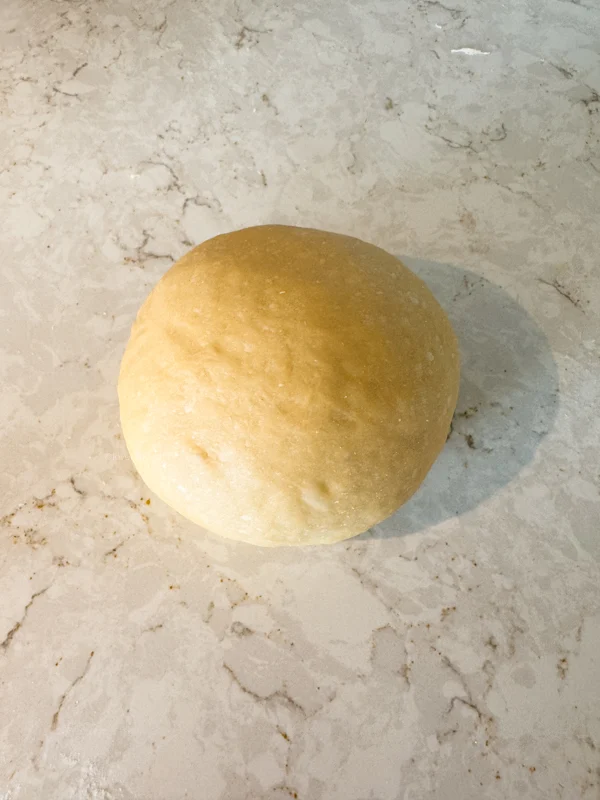
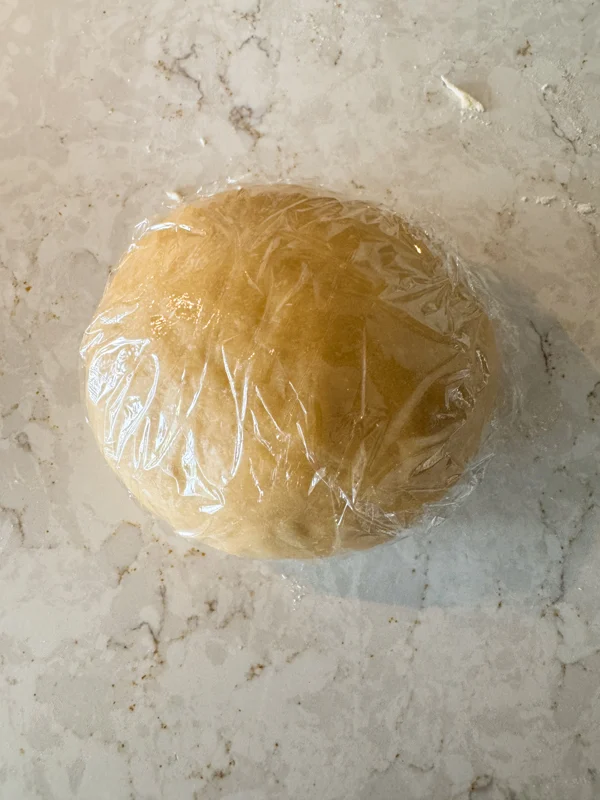
Knead for 5 minutes or so until the dough is smooth and supple, and springs back when poked. Wrap the dough in plastic wrap and place it in the fridge for 2 hours before using or leave for 1 hour at room temperature to relax the gluten.
Stand Mixer
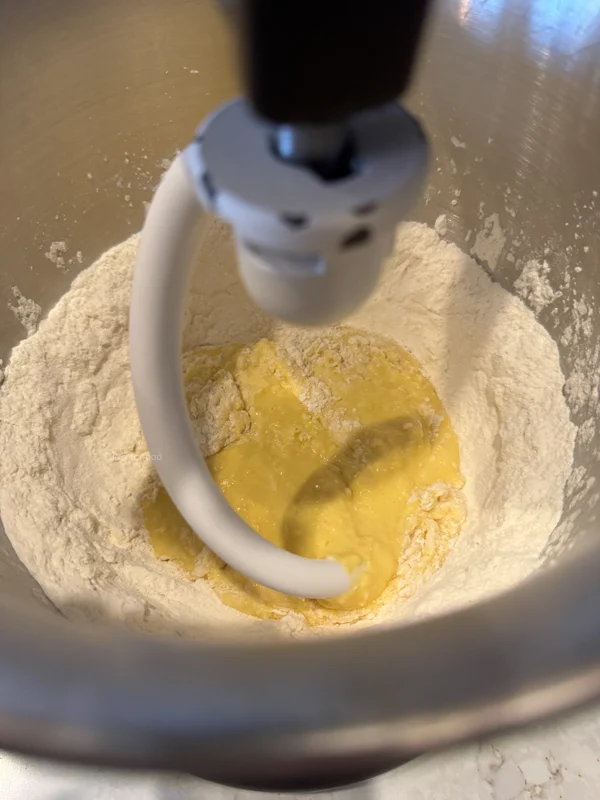
Using a dough hook, mix the eggs on medium speed. Once an eggy slurry forms turn up the speed to medium-high. It will start pulling more dough in and you will want to turn it back down to medium, even medium-low if it’s kicking up a lot of flour. Once it’s more cohesive you can turn it back up to medium. This should take about 2-3 minutes.

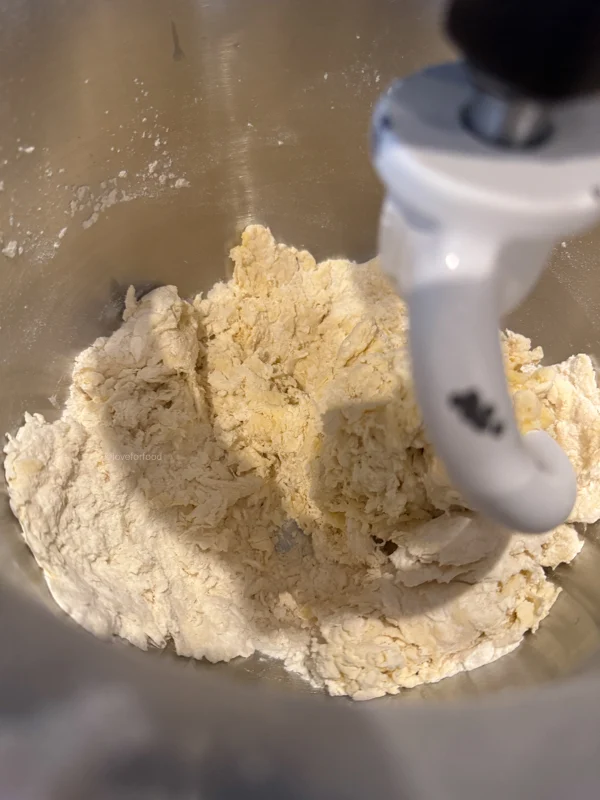
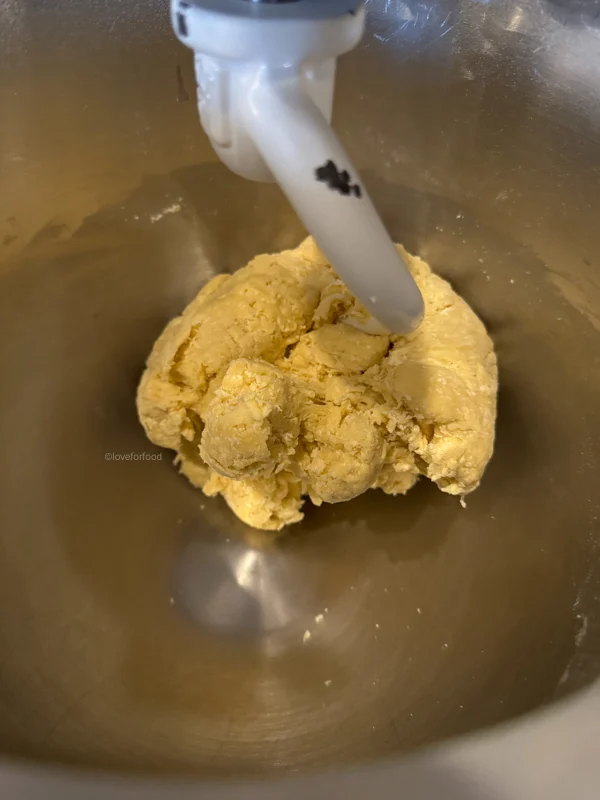
It’s going to look really scraggly for a while, but it will start to come together after another few minutes on medium – if it’s not coming together, add 1-2 tbsp of water to help. Do not add too much, the dough should be quite firm.
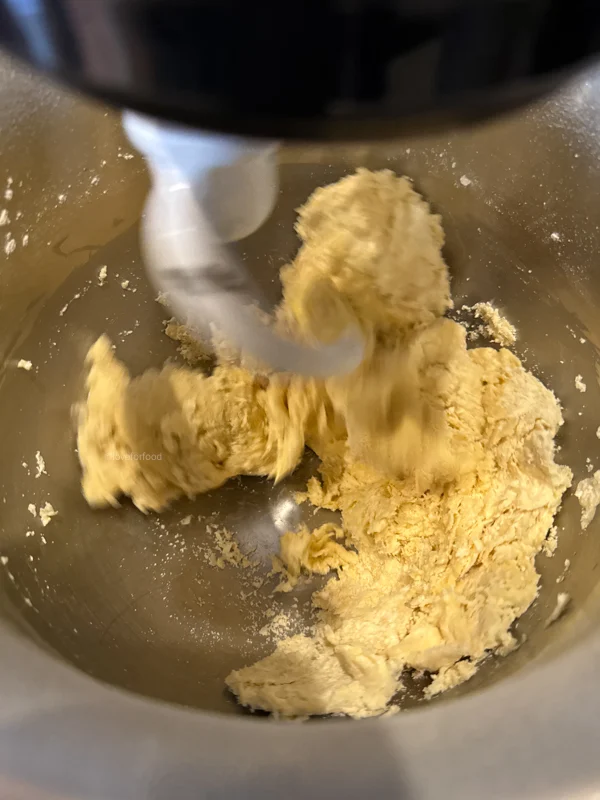
Once the dough comes together into a dough ball, turn the speed down to the lowest setting and let it knead for 3-5 minutes. If your stand-mixer is like mine, it might dislodge – so be careful. I end up removing it and kneading by hand until it’s smooth and supple, and springs back when poked (about 3 minutes).
Food Processor
If you’d rather use a food processor, pulse the flour and eggs until they come together into a scraggly mess. Remove and knead by hand (3-5 minutes) until its smooth and springs back when poked. I never use a food processor, but I aim to make a more detailed step-by-step instruction soon.
How To: Rolling Out The Dough
Cut the dough into 6-8 pieces and cover all but one to ensure they don’t dry out.
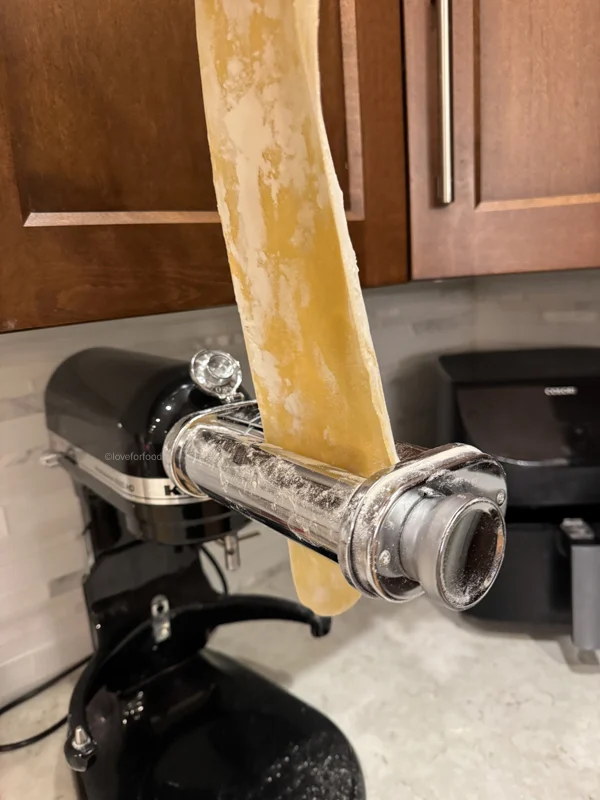
Press the first piece of dough into a disc and coat it lightly in flour. Using either a hand crank or powered pasta roller machine, adjust the thickness setting to 1 (the largest setting) and run the disc of dough through on low-medium speed.
Fold the flattened dough in half like a book, running the widest side through the pasta roller first. Ideally, your pasta sheets will run the full width of the pasta roller so you have a somewhat square shape. Continue to fold a handful of times and run through the pasta roller without adding more flour until it is the desired shape.
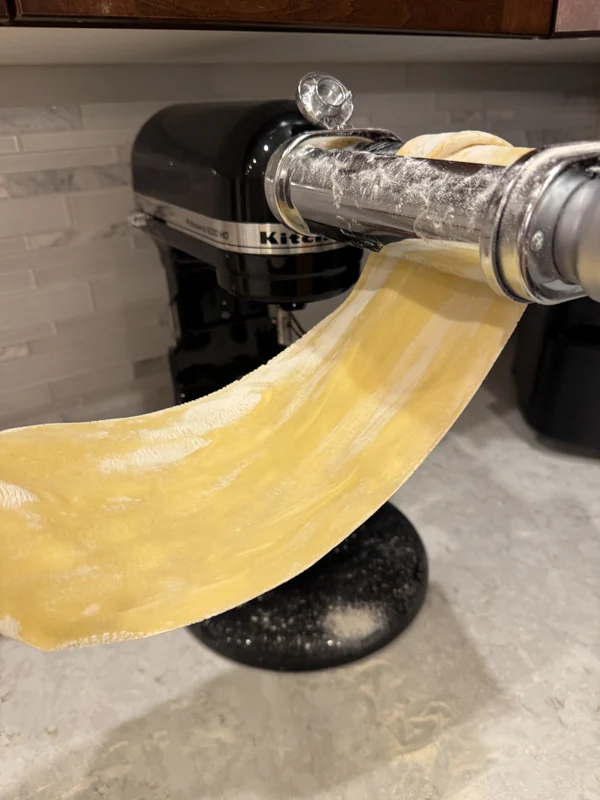
Once the dough is the full width of the pasta roller, coat it in flour and adjust the thickness setting on the machine to 2. Run the dough through the machine. Continue to do this, adding more flour if necessary, until you reach the 3rd thinnest setting (for me that’s 6). At this stage you may either wish to run it through to 7 or to 8 depending on preference and your machine.
- Tip: Make sure you’re running the dough sheets through straight (if they’re crooked they may tear) and catch them with your other hand to ensure the dough doesn’t stretch unnecessarily. You can do this yourself more easily with a powered pasta machine, but it’s a great time to get a hand in the kitchen if not.
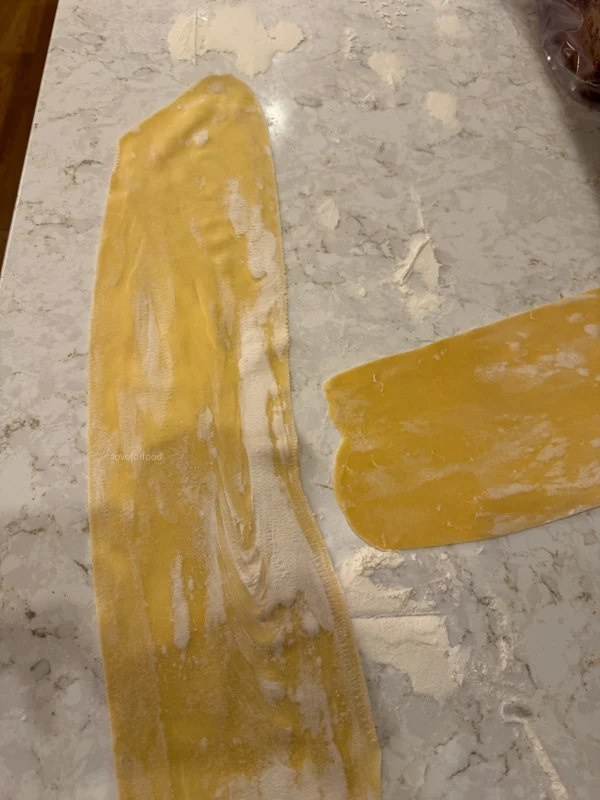
Before running the pasta sheet through the final time or last 2 settings, coat generously in flour – this is where it is at the highest risk to tear. Lay the sheet down on a flat surface and coat well in flour (skip if you’re making ravioli).
From here you can use your homemade pasta sheets in lasagna, make ravioli, or cut fresh noodles. If you cut the noodles, you can even leave them to dry or freeze them for future use!
How To: Cut Noodles
With a pasta sheet there are a number of different noodles you can easily make with a knife. If you have a cutting attachment you can run the sheets through to make spaghetti or fettuccini. By hand you can make fettuccini, linguine, tagliatelle, pappardelle for long noodles and experiment with different types of short noodles.
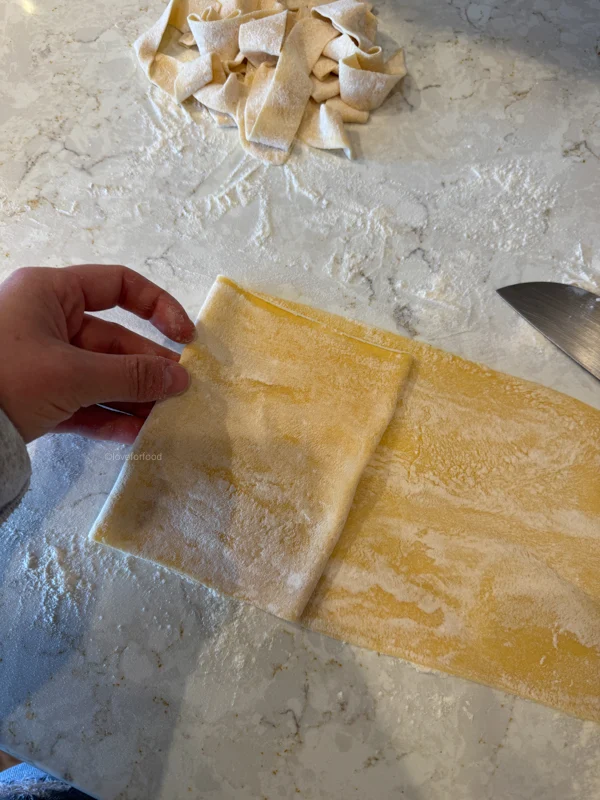
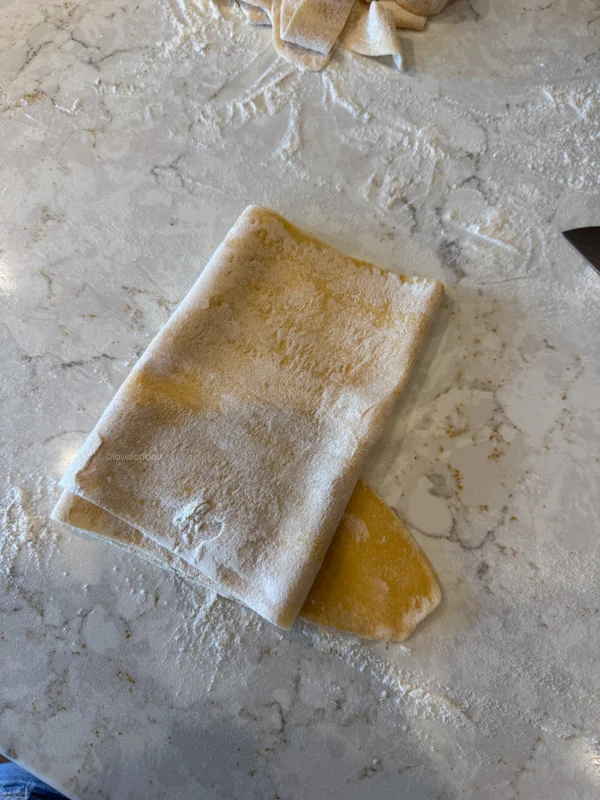
To cut the noodles – make sure you flour both sides of the pasta sheet well before folding. Letting the pasta sheets dry out for 5 minutes will help prevent sticking. Fold one end of the sheet over 1/4 of itself, then fold that section again over another 1/2 of the dough. One last fold will cover the last bit of unfolded pasta. This enables you to cut longer noodles.
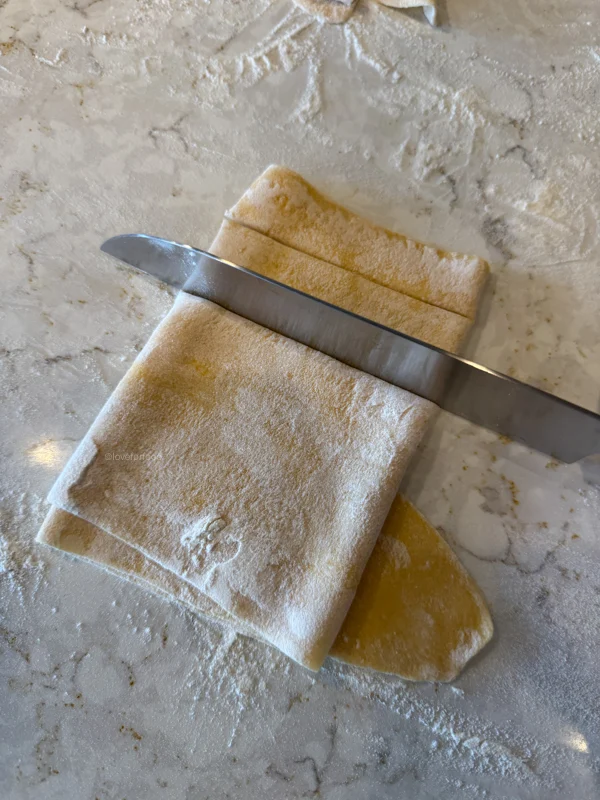
Use a sharp knife to press down/cut through the sheets in your desired thickness. Do not drag the knife. Immediately after cutting, unroll the pasta and toss in plenty of additional flour and set aside.
How To: Cooking Fresh Pasta
Cook your pasta once everything is ready and you are about to eat.
Bring a pot of well-salted water to a boil. Add the fresh pasta and cook, stirring occasionally, for 2-4 minutes until al dente. They will no longer be chewy but have a distinct bite. Try a noodle every 30 seconds after 2 minutes until you find the texture you like!
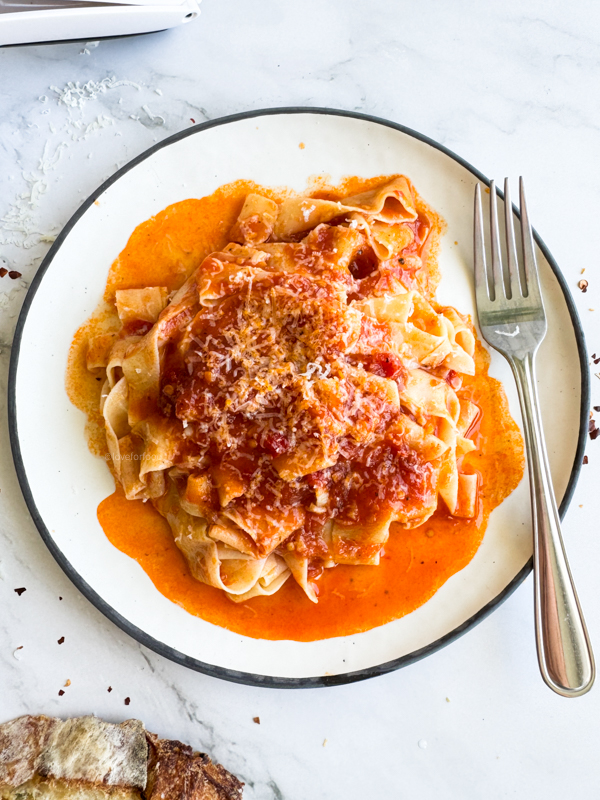
Remove the noodles from the boiling water and either add straight into your sauce or serve into individual bowls and top with sauce.
If you’re making lasagna, you will only need to boil the noodles for 30 seconds before removing to a clean tea towel to cool slightly.
Recipes to Enjoy Homemade Pasta:
- Traditional Ragù alla Bolognese
- My Mom’s Homemade Pasta Sauce
- 20-Minute Garlic Scape Arrabbiata Sauce
- Mushroom Ragù alla Bolognese Sauce
- Impossibly Delicious Vegan Meatballs
- 20-Minute Shrimp Pesto Pasta

Easy and Delicious Homemade Pasta
Ingredients
Equipment
Method
- Place a mound of flour on a clean surface and make a large well in the center. Crack the eggs into the well, and use a fork to break up the yolks and begin to whisk.
- Beat with the fork as you incorporate more flour until the egg/flour mixture becomes extremely thick and gooey. When you pick up your fork the mixture should hold onto it and slowly fall (not "rip").
- Using a bench scraper, scrape up the flour and fold over the egg mixture from each side. Continue doing this until almost all of the flour has been incorporated. Begin scraping in a scooping circular motion and folding the dough over itself. Continue doing this until it somewhat comes together into a dough mass.
- Begin to knead the dough together into a cohesive ball by folding it over itself multiple times until it's no longer too sticky to handle. Work the remaining flour in and begin kneading the dough with the heel of your palm, dragging the dough away from you.
- Knead for 5 minutes or so until the dough is smooth and supple, and springs back when poked. Wrap the dough in plastic wrap and place it in the fridge for 2 hours.
- Using a dough hook, mix the eggs on medium speed. Once an egg-y slurry forms turn up the speed to medium-high. It will start pulling more dough in and you will want to turn it back down to medium, even medium-low if it’s kicking up a lot of flour. Once it’s more cohesive you can turn it back up to medium. This should take about 2-3 minutes.
- It’s going to look really scraggly for a while, but it will start to come together after another few minutes on medium – if it’s not coming together, add 1-2 tbsp of water to help. Do not add too much, the dough should be quite firm.
- Once the dough comes together into a dough ball, turn the speed down to the lowest setting and let it knead for 3-5 minutes. If your stand-mixer is like mine, it might dislodge – so be careful. I end up removing it and kneading by hand until it’s smooth and supple, and springs back when poked (about 3 minutes).
- Cut the dough into 6-8 pieces and cover all but one to ensure they don’t dry out.
- Press the first piece of dough into a disc and coat it lightly in flour. Using either a hand crank or powered pasta roller machine, adjust the thickness setting to 1 (the largest setting) and run the disc of dough through on low-medium speed.
- Fold the flattened dough in half like a book, running the widest side through the pasta roller first. Ideally, your pasta sheets will run the full width of the pasta roller so you have a somewhat square shape. Continue to fold a handful of times and run through the pasta roller without adding more flour until it is the desired shape.
- Once the dough is the full width of the pasta roller, coat it in flour and adjust the thickness setting on the machine to 2. Run the dough through the machine. Continue to do this, adding more flour if necessary, until you reach the 3rd thinnest setting (for me that's 6). At this stage you may either wish to run it through to 7 or to 8 depending on preference and your machine.
- Tip: Make sure you're running the dough sheets through straight (if they're crooked they may tear) and catch them with your other hand to ensure the dough doesn't stretch unnecessarily. You can do this yourself more easily with a powered pasta roller, but it's a great time to get a hand in the kitchen if not.
- Before running the pasta sheet through the final time or last 2 settings, coat generously in flour – this is where it is at the highest risk to tear. Lay the sheet down on a flat surface and coat well in flour.
- With a pasta sheet there are a number of different noodles you can easily make with a knife. If you have a cutting attachment you can run the sheets through to make spaghetti or fettuccini.
- To cut the noodles – make sure you flour both sides of the pasta sheet well before folding. Let them sit uncovered for 5 minutes to dry out slightly. Fold one end of the sheet over 1/4 of itself, then fold that section again over another 1/2 of the dough. One last fold will cover the last bit of unfolded pasta. This enables you to cut longer noodles.
- Use a sharp knife to press down/cut through the sheets in your desired thickness. Do not drag the knife. Immediately after cutting, unroll the pasta and toss in plenty of additional flour and set aside.
- Cook your pasta once everything is ready and you are about to eat.
- Bring a pot of well-salted water to a boil. Add the fresh pasta and cook, stirring occasionally, for 2-4 minutes until al dente. They will no longer be chewy but have a distinct bite. Try a noodle every 30 seconds after 2 minutes until you find the texture you like!
- Remove the noodles from the boiling water and either add straight into your sauce or serve into individual bowls and top with sauce.