These homemade vegetable spring rolls pack tons of flavour and they’re wrapped in a tiny crunchy package. What’s not to love? This recipe was inspired by Edna, who always made the best homemade spring rolls.
Spring rolls have a history in almost every Asian culture – Thai, China, Vietnam, and more! All have slight variations in filling, spices, and egg or egg-free wrappers, but all have one thing in common: they’re delicious!
Adapted from The Woks of Life.
To Make Homemade Vegetable Spring Rolls
First you will need to take the spring roll wrappers out of the freezer and place on the counter before you start prepping the vegetables or thaw overnight in the fridge (best results). If you open the package, make sure you keep the wrappers covered with a moist towel or in a sealed bag.
Prep the Filling
Begin by removing the stems from the shiitake mushrooms before soaking them in hot water for at least 1 hour. Place the caps facing downwards like an umbrella to help them rehydrate. Give them a stir halfway through.
Just prior to preparing the filling, soak the mung bean noodles in warm water for 10 minutes until they are rehydrated. Drain and cut the noodles into small 1/2 inch pieces using scissors.
At this time, prepare all the add ins to stir fry. Mince the mushrooms and garlic and set aside. Shred the carrots and bell pepper, set aside. Shred both cabbages and set aside. Whisk together the shaoxing wine, sugar, salt, sesame oil and white pepper and set aside beside the mung bean noodles.
Cook the Filling
Prepare the filling by heating a large wok over medium-high heat. Add 2 tbsp vegetable oil to the wok and promptly add the garlic and mushrooms. Cook for 15 seconds and then add the carrot and bell pepper. Cook for another 15 seconds.


Turn the heat up to high and add the cabbages. Toss well and cook for 1 minute. Add the noodles, shaoxing wine, salt, sugar, sesame oil, and pepper. Cook for another minute.


Add the scallions, toss, then set the filling aside on a large baking sheet with a cooling rack beneath it so it can get airflow and cool. Stir once or twice to speed up the process. This will take about 30 minutes.
Wrap the Spring Rolls
When ready to prepare the spring rolls, place a wrapper on a clean work surface (keep the remaining wrappers covered with a damp towel) with your cornstarch slurry ready beside you.
Add 25g of filling in the middle of the wrapper. Fold the corner closest to you over the filling and tuck and pull it towards you to form the roll. Fold the two sides over the roll like an envelope, making sure it is in a straight line with how you will be rolling the spring roll. Using the cornstarch slurry, wet the envelope sides and then roll the spring roll away from you for one or two folds.


Now wet the top corner of the envelope and continue rolling the spring roll tightly away from you until it is a nice little roll. Place it seam side down on a baking sheet covered with plastic wrap or another baking sheet.
Fry the Spring Rolls
Once all of the spring rolls are ready, heat a large heavy bottom pot or skillet over medium-high heat with at least 1 inch of oil at the bottom. Do not fill over halfway up the sides of the pot. Once the oil reaches 375 – 400°F, add about 10 spring rolls to the pot one at a time, careful not to initially overcrowd or add them too quickly. This can be dangerous and lead to overflow from bubbling.
Cook until they turn a light golden brown (5 minutes), then set aside to drain and cool. Repeat with the remaining rolls.


Freeze and Reheat
To freeze the extra rolls once they’re cooked, place them on a large baking tray in a single layer and freeze them before separating and storing in an airtight container or freezer bag. Reheat in an air fryer for 8-10 minutes at 350°F or in the oven at 375°F for 15 – 20 minutes, do not thaw first.
Enjoy these spring rolls in Vietnamese Chicken Vermicelli Bowls or Vegan Vermicelli Bowls as a topping or side.
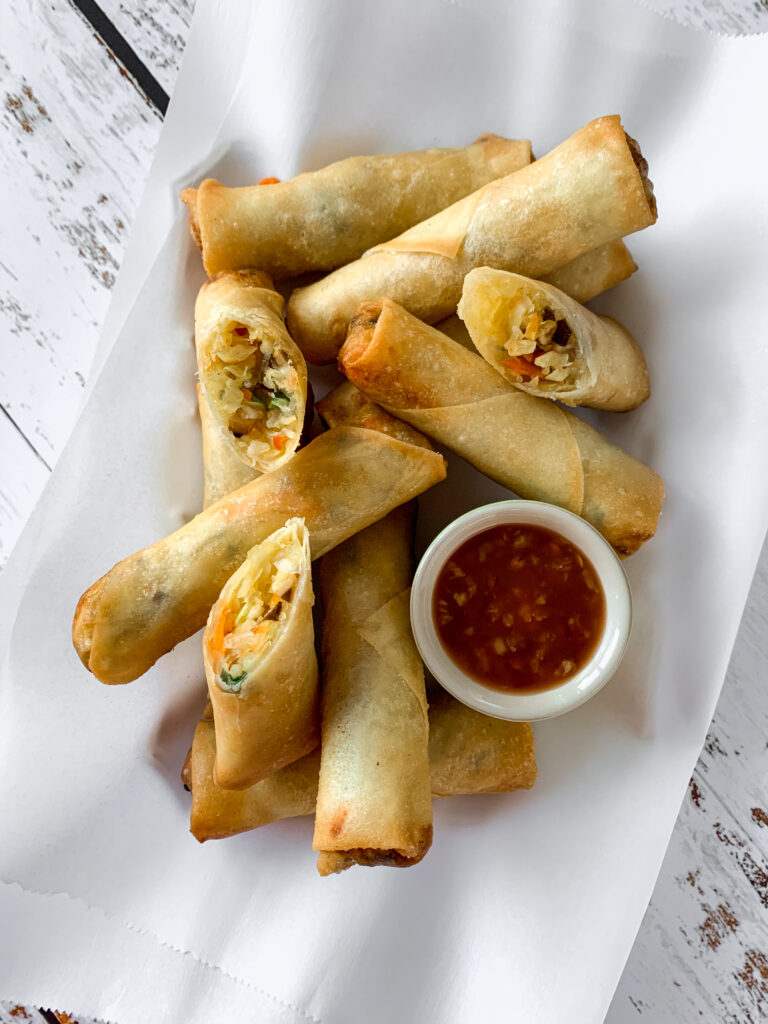
Try dipping them in my Easy Homemade Sweet Chili Sauce for even more deliciousness.

Homemade Fried Vegetable Spring Rolls
Ingredients
Equipment
Method
- Take the spring roll wrappers out of the freezer and place on the counter before you start prepping the vegetables or thaw overnight in the fridge (best results).
- Begin by removing the stems from the shiitake mushrooms before soaking them in hot water for at least 1 hour. Place the caps facing downwards like an umbrella to help them rehydrate. Give them a stir halfway through.
- Just prior to preparing the filling, soak the mung bean noodles in warm water for 10 minutes until they are rehydrated. Drain and cut the noodles into small 1/2 inch pieces using scissors.
- At this time, prepare all the add ins to stir fry. Mince the mushrooms and garlic and set aside. Shred the carrots and bell pepper, set aside. Shred both cabbages and set aside. Whisk together the shaoxing wine, sugar, salt, sesame oil and white pepper and set aside beside the mung bean noodles.
- Prepare the filling by heating a large wok over medium-high heat. Add 2 tbsp vegetable oil to the wok and promptly add the garlic and mushrooms. Cook for 15 seconds and then add the carrot and bell pepper. Cook for another 15 seconds.
- Turn the heat up to high and add the cabbages. Toss well and cook for 1 minute. Add the noodles, shaoxing wine, salt, sugar, sesame oil, and pepper. Cook for another minute.
- Add the scallions, toss, then set the filling aside on a large baking sheet with a cooling rack beneath it so it can get airflow and cool. Stir once or twice to speed up the process. This will take about 30 minutes.
- When ready to prepare the spring rolls, place a wrapper on a clean work surface (keep the remaining wrappers covered with a damp towel) with your cornstarch slurry ready beside you.
- Add 25g of filling in the middle of the wrapper. Fold the corner closest to you over the filling and tuck and pull it towards you to form the roll. Fold the two sides over the roll like an envelope, making sure it is in a straight line with how you will be rolling the spring roll. Using the cornstarch slurry, wet the envelope sides and then roll the spring roll away from you for one or two folds.
- Now wet the top corner of the envelope and continue rolling the spring roll tightly away from you until it is a nice little roll. Place it seam side down on a baking sheet covered with plastic wrap or another baking sheet.
- Once all of the spring rolls are ready, heat a large heavy bottom pot or skillet over medium-high heat with at least 1 inch of oil at the bottom. Do not fill over halfway up the sides of the pot. Once the oil reaches 375°F, add about 10 spring rolls to the pot one at a time, careful not to initially overcrowd or add them too quickly. This can be dangerous and lead to overflow from bubbling.
- Cook until they turn a light golden brown (3-5 minutes), then set aside to drain and cool. Repeat with the remaining rolls, monitoring the oil temperature.
- To freeze the extra rolls once they’re cooked, place them on a large baking tray in a single layer and freeze them before separating and storing in an airtight container or freezer bag. Reheat in an air fryer for 8-10 minutes at 350°F or in the oven at 375°F for 15 – 20 minutes, do not thaw first.

Recent Comments